***Note***Only users with Accounts Permissions can access this feature.
Follow these steps to create a Cost Estimate:
1. Click on Finance from the left and menu (Or you can click on Add+ in the bottom left and select Cost Estimate).
2. Click on Cost Estimates.
3. Click New Cost Estimate.
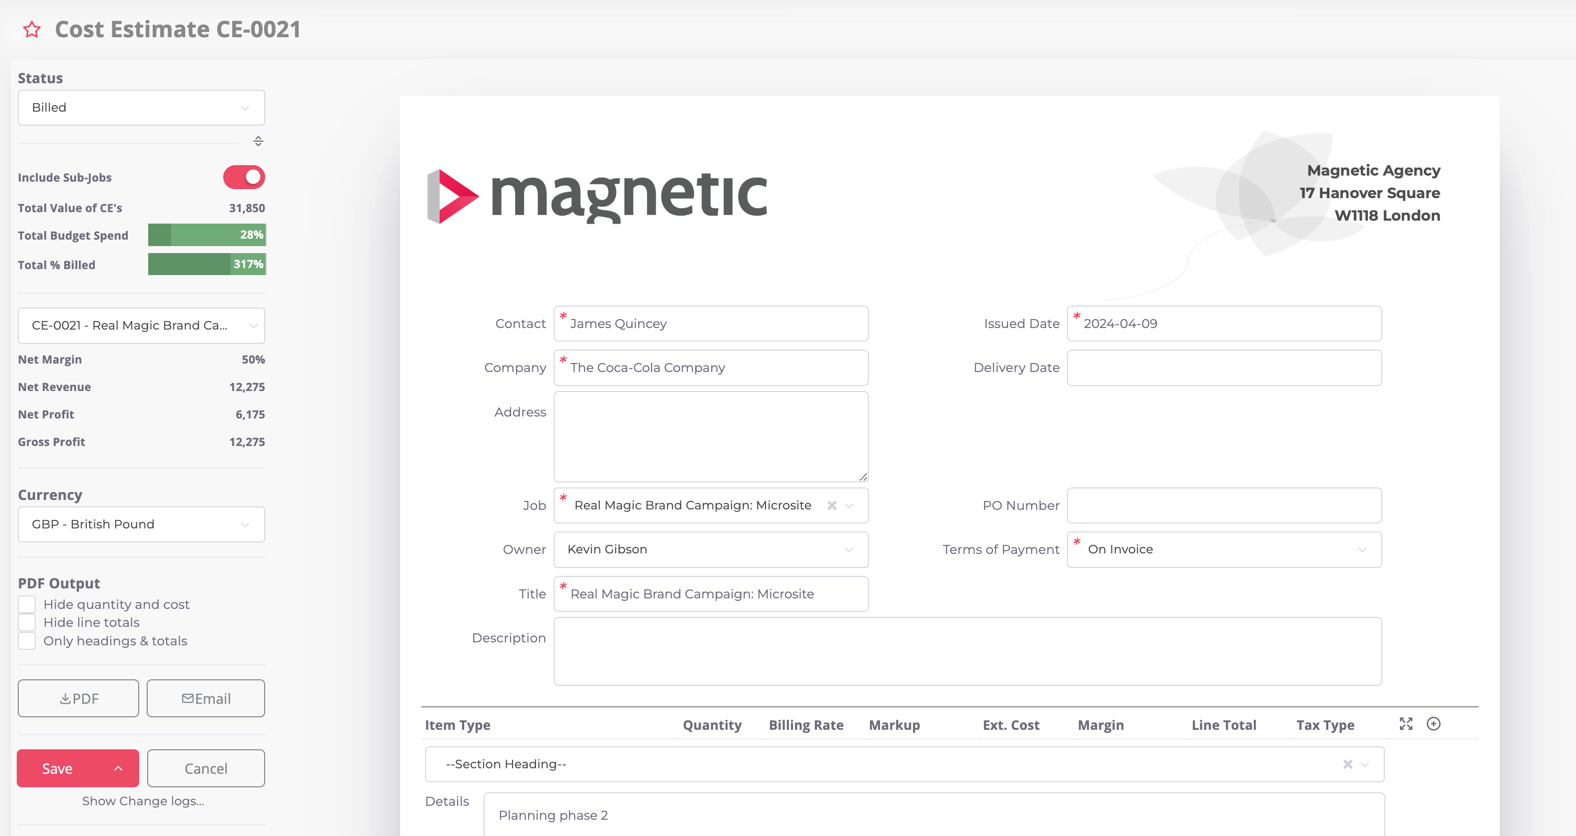
- Contact: Contact at the company the CE is addressed to.
- Company: Company the CE is for.
- Job: The job the CE is associated with. Assign this CE to a particular job by adding the relevant job name in here.
- Owner: Person in charge of the CE.
- Title: Cost estimate title.
- Tag: A comma separated list of tags used to segment your database.
- Issue dates: Date the CE is issued.
- Delivery date: Date goods will be shipped / service provided.
- PO Number: Purchase order number supplied by company.
- Status: Select the workflow stage the CE is in from the dropdown menu. E.g. Draft, Internally Approved.
- Terms of payment: Select the payment term from the dropdown menu. (You can create your own payment term in your company settings under the accounts section).
- Description: Add any extra information you think is important in this text box.
- Hide quantity and costs on PDF: Tick this box if you want this information to be hidden from the client when viewing the PDF.
- Only display section headings and sub-totals on PDF's: Tick this box if you want this information to be hidden from the client when viewing the PDF.
- Hide line totals on PDFs: Tick this box if you want this information to be hidden from the client when viewing the PDF.
- Item types:
- Select the relevant item type from the dropdown menu. Alternatively, select the "New item" option from the dropdown menu and create a new item type.
- Section Headings: If you would like to split your CE into sections, choose Section Heading and name it. When printing your CE you will see the line items split and a total per section is automatically added.
- Mouse over a line item to display icons to change order, add new or delete line items.
TIP: To quickly duplicate an item type, hit the copy icon as highlighted below:
- Quantity: A number of hours for that particular item type to be charged for.
- Cost: Basic cost per line item without markup added.
- Mark-up: Percentage added onto Cost. (Note: For externally sourced products/services, set the markup you are adding in before selling).
- Ext. Cost: The product of quantity x cost that the client will be charged. This amount does not include the margin.
- Margin: Profit value that is added onto the external cost amount.
- Line Total: The total of the external cost plus the profit margin.
- Tax type: Select one of the following options on the dropdown menu:
- No Tax: Items which are not taxed.
- Taxable: Items which follow standard taxable rules.
- Zero Rated: Items that are zero-rated for tax purposes.
- Exempt: Item types which cannot be charged VAT.
- Details: This text box is useful if you want to add additional information about the item type being added.
5. Add a discount percentage or change the tax percentage if you wish.
6. Save the details.
7. Once you have created your CE, mouse over it to reveal the Action Menu (3 dots). Use it download or email the CE straight from Magnetic, for example. (The same method applies to all other account types in Magnetic)
***Note***You can also create a CE from within an opportunity by Selecting "Add Cost Estimate" from the Actions dropdown on the opportunity dashboard
See screenshots below:
Adding a CE from the Cost Estimates Page:

Adding a CE from the Quick Add menu


Actions menu showing additional options available for Cost Estimates

Was this article helpful?
That’s Great!
Thank you for your feedback
Sorry! We couldn't be helpful
Thank you for your feedback
Feedback sent
We appreciate your effort and will try to fix the article