Overview
The Magnetic ↔ QuickBooks integration makes it easy to sync your business and financial data
With this integration, you can:
Export Tax invoices, credit notes, supplier invoices and supplier credit notes as well as manual Journals and expenses from Magnetic into Quickbooks
Export item types
Maintain document states - Paid/Voided etc.
Setting up the integration
Step 1: Connecting to Quickbooks
Note: Only admin users can access company settings page and configure a QuickBooks integration
Log in to your Magnetic account.
Navigate to Company Settings > Finance
Select the billing entity that you want to integrate with QuickBooks and edit it

Scroll down to Accounts Integration Settings
Select QuickBooks from the Accounting platform dropdown (leave Cost Estimates & Purchase Orders at None)
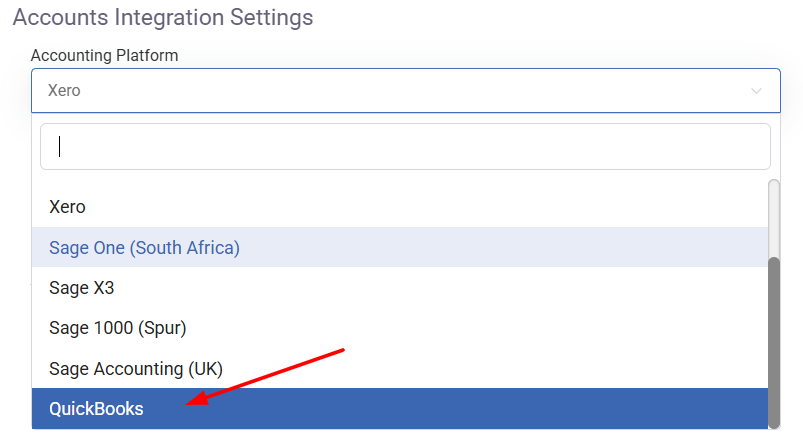
Select your export method either Automatically or Manually export
If exporting journals, please check Enable WIP otherwise this can be left unchecked

if using WIP, set the revenue recognition models

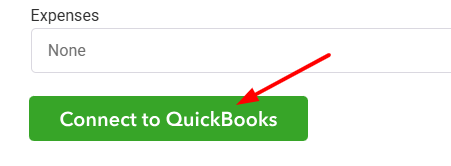
Select Connect to QuickBooks
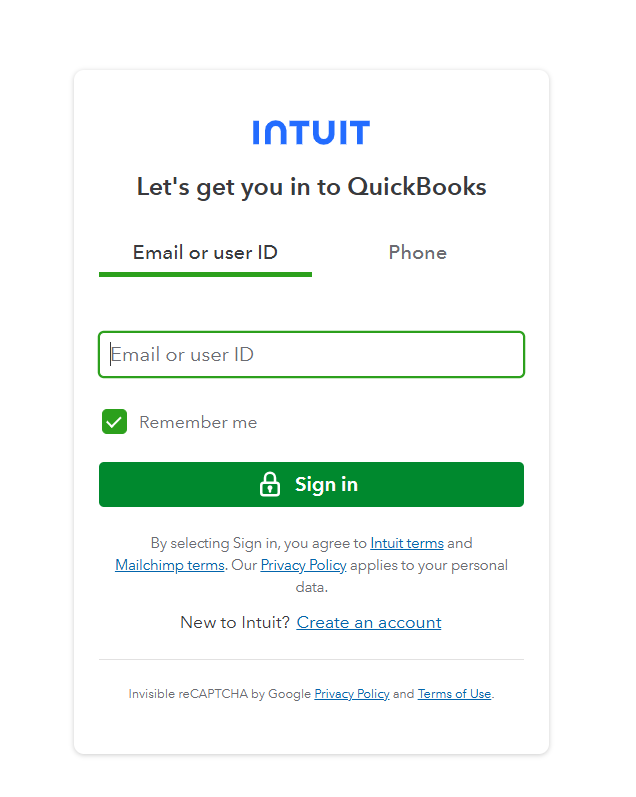
You’ll be redirected to the QuickBooks On login page. Sign in with your QuickBooks credentials.
Choose the Quickbooks organization to link the Magnetic billing entity to. (This option is only applicable if you have more than one organisation set up in Quickbooks)
Authorize Magnetic to access your QuickBooks account
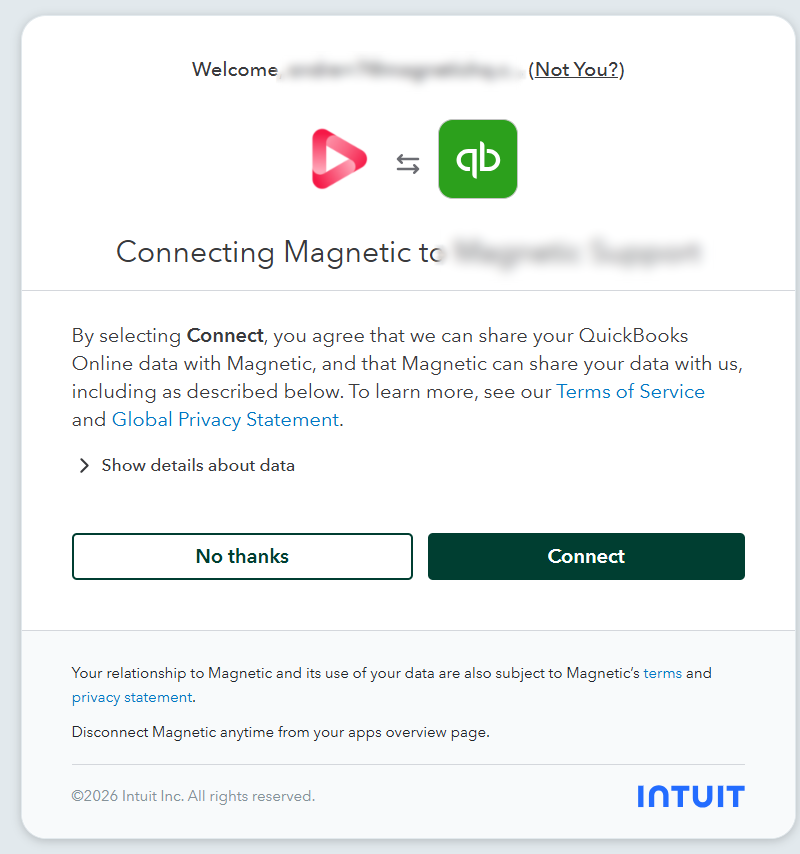
Your accounts will now be linked and you will be redirected back to Magnetic to configure your tax mappings (See Step 2 below)
IMPORTANT:
- Your integration with Quickbooks needs to have an active associated Magnetic Account.
- Your Magnetic Billing entity and Quickbooks organization need to share the same base currency
Step 2: Configure your Default Sales/Purchase Accounts and Tax Mappings
- Configure your tax settings and how these are mapped to QuickBooks from Magnetic.
*Note - these are example mappings only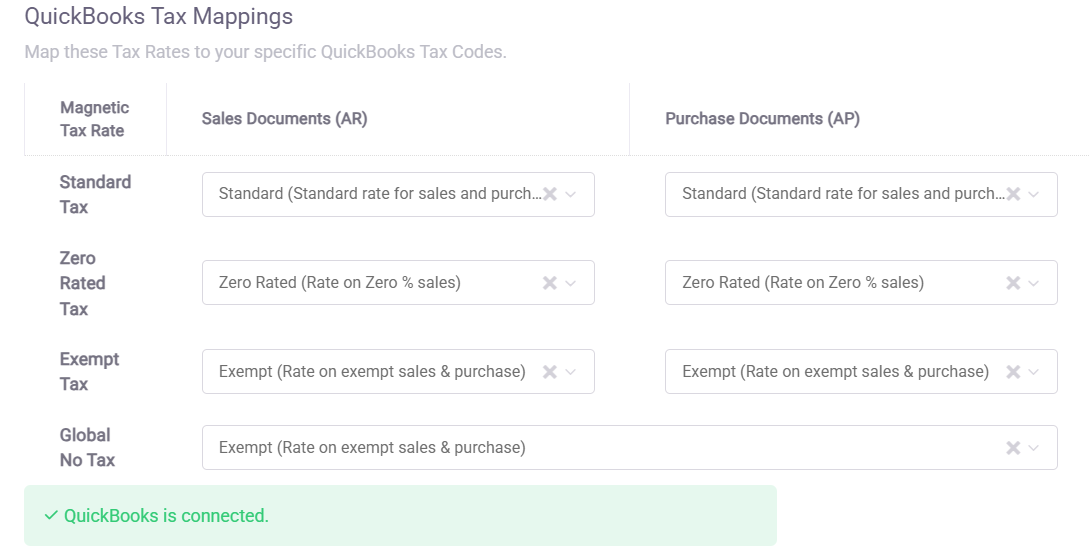
- Specify the Default Accounts for WIP (if using), Sales & Purchase, as well Intercompany Accounts that are used when creating items in QuickBooks
*Note - these are example mappings only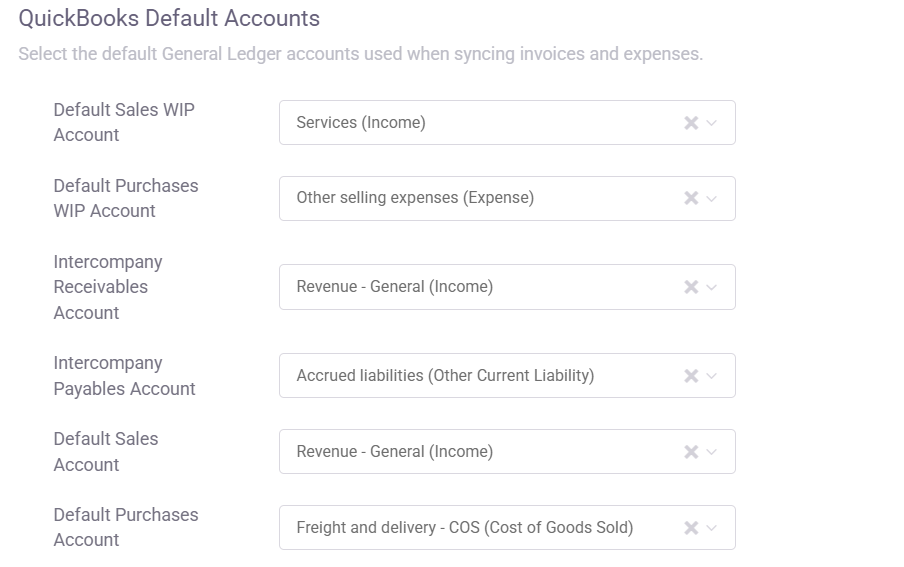
- Save
- You can check the status of your integration via your billing entity in Company Settings> Finance

Step 3: Configure your item types
Note: If an item type does not exist in QuickBooks, it will be automatically created the first time it is used in Magnetic. This will only update when you create an Invoice or Credit Note using that item type.
For item types do not exist in QuickBooks:
- Navigate to Finance> Item Types
- Select New Item type
- Fill in your item type details
- Select the relevant Sales Code and Cost of Sales code for the item type
- The sales codes/cost of sales codes seen in the drop down will be pulled automatically from the QuickBooks account that has been authorised
- Leave the Item Code field blank
- Save
For item types that already exist in QuickBooks
- Navigate to Finance> Item Types
- Select New Item type
- Fill in your item type details
- Specify the Item Code (SKU in QuickBooks) obtained from QuickBooks (This will link the Item Type in Magnetic to the Item in Quickbooks)
- Save
Exporting your Accounts
If you've set your integration exports to automatically export, you do not need to do anything as your accounts will be auto-exported once you've saved the document.
If your integration export is set to manually export, please follow these steps to export manually:
- For a bulk exports - Coming Soon
- Navigate to Finance > Finance Exports
- Click on the Billing entity that you wish to export for
- Click Retry Export to QuickBooks
- Alternatively, if you wish to export documents grouped by type e.g tax invoices, then click the arrow icon and choose the relevant option
- Confirm
- Wait a few minutes for your accounts to export.
- For individual exports
- Navigate to the relevent list view
- Hover of the document in the list and select Actions
- Select Retry Export to QuicBooks
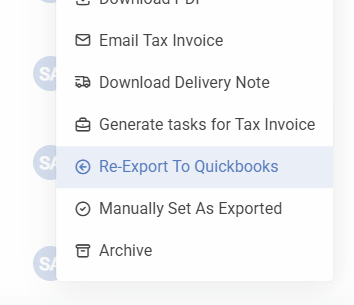 TIP: You can multi-select multiple records on the list view and use the Bulk edit function to Export multiple documents to QuickBooks instead of one by one.
NOTE: You can check the export status on the relevent list view and checking the export icons indicated on these pages.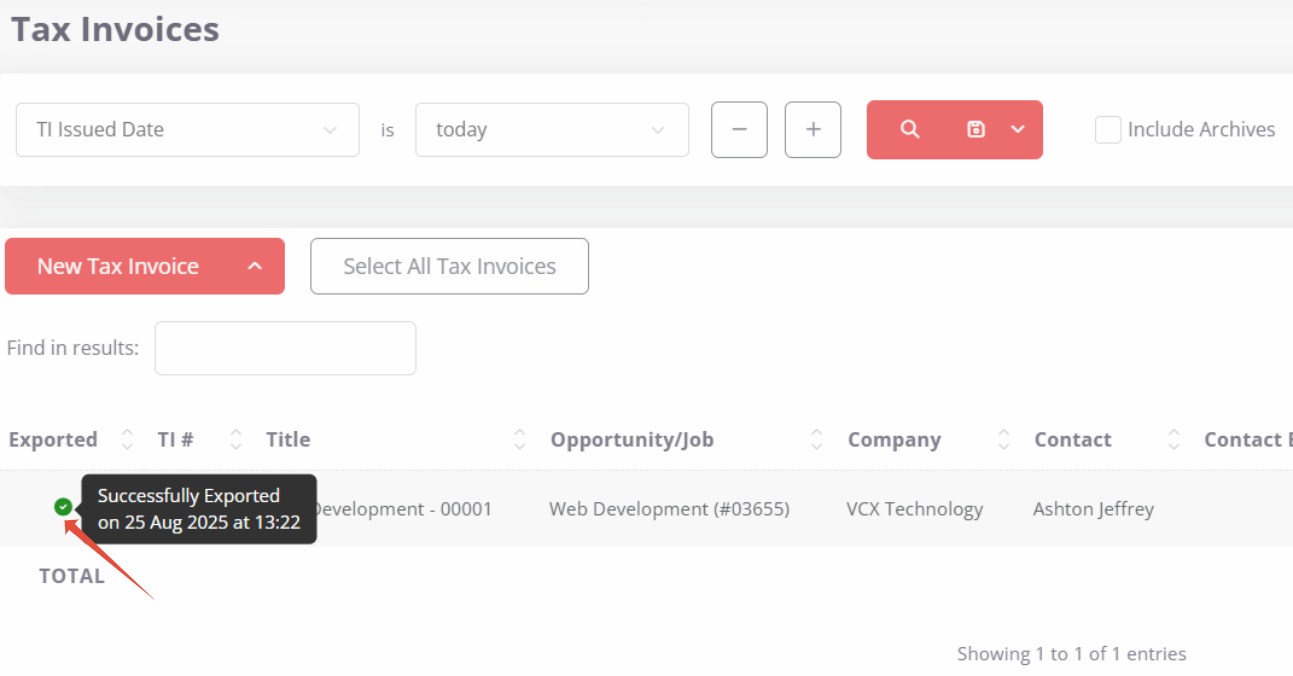
IMPORTANT:
- The details per line item will also be exported through to Quick
- Quickbooks does not have per-line markup as seen in Magnetic, therefore the value sent through to QuickBooks is inclusive of markups.
- Discounts in Magnetic will be for the entire invoice instead of per line, in QuickBooks each line will specify the discount.
- Magnetic only pulls in revenue(sales) accounts and cost of sales (purchase/expense) accounts. Balance sheet accounts e.g asset, liability and equity accounts aren't part of the integration and they won't appear in Magnetic
EXPORT ICONS:
If there is a failure you will receive an in-app notification. View the in-app notification to learn more about the reason for the error.
There are 3 different Magnetic export states for QuickBooks.
- Red icon:

- Possibility 1: The account has never been exported
- Possibility 2: The account has tried to export but contained errors - doesn't exist in QuickBooks. You can view the errors when hovering over the red icon.
- Orange Icon
 It has previously exported successfully to QuickBooks, BUT the last attempted export contained errors. This means that there may be a mismatch between the accounts in QuickBooks and Magnetic. You can view the errors when hovering over the orange icon.
 - Green Icon:
 The account has been successfully exported to QuickBooks
 - You can view the account on QuickBooks by simply clicking on the green icon. This will open the QuickBooks version of the invoice for quick access.
Was this article helpful?
That’s Great!
Thank you for your feedback
Sorry! We couldn't be helpful
Thank you for your feedback
Feedback sent
We appreciate your effort and will try to fix the article