Welcome to Briefin — your new creative command center. You’ve just signed up your company, and you’re already on the Brief Kanban board. Let’s walk you through the first steps to set up your workspace and get your team rolling.
1. Explore briefin
When you have signed in, you’ll see that we’ve already set up some of the basics for you:
3 Categories to help organize incoming work by category.
2 Collections to manage access to brief templates and briefs for users. Read more.
4 Statuses to track progress from idea to delivery. Read more.
Right now, everything’s ready to run — but there are no brief templates yet. That’s where the magic starts.
Click on the Workspace Settings tab in the upper section.

2. Add Your First Brief Template
Brief templates are the backbone of your creative process. They define what information you’ll collect before work kicks off.
You have two options:
Use a Library Template (Recommended): Pick a best-practice template from our library to get started in seconds.
Create a Custom Template: Build your own from scratch and tailor it to your agency’s workflow.
To add a new template click on Browse Template Library or Create Template.
✨ Pro Tip: Most teams start with a library template, then customize as they go.
Read more about brief templates.

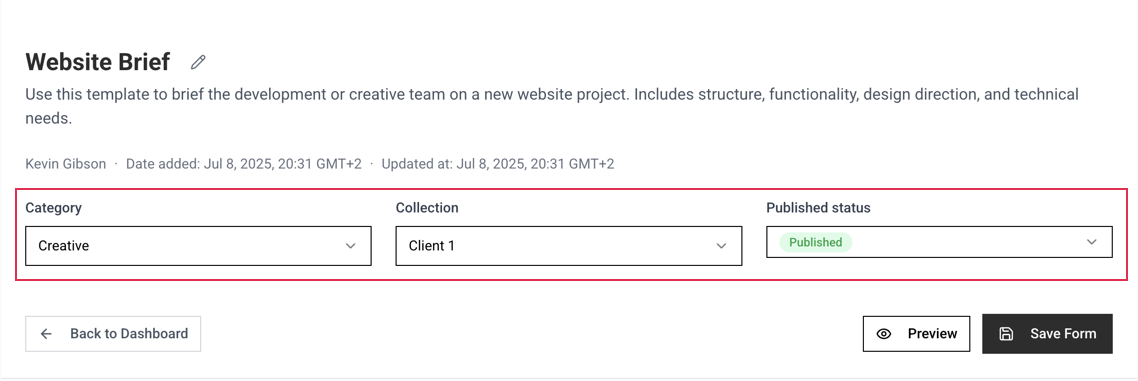
Next, you want to make sure the brief template is assigned to a Category, a Collection and set to Published.
3. Invite Your Team
briefin works best when everyone’s in the loop. As the admin, you can invite users straight from your dashboard.
Add your client contacts, creatives, account managers, and project leads.
Assign roles so the right people see the right work.
Collaboration is smoother when the whole team has a seat at the table.
To invite a user, go to Workspace Settings -> Users -> Invite User
Read more about User Management.
User Roles
Admins have full access, Managers oversee and review all briefs, and Members can submit and review briefs within their assigned collections.
4. Create a Workflow & Attach It to Your Template
Now it’s time to put your process into motion.
Head over to Workflows and create the Brief Review path -> who must be notified when a brief is submitted.
Attach that workflow to your brief template so every new brief follows the same streamlined steps.
Read more about Brief Review and Collaboration.
A. Create the workflow
B. Open the brief template and add the workflow.
This ensures every project flows through your pipeline without missing a beat.
✅ You’re Ready to Roll
With your first template, your team onboarded, and your workflow set up, you’re all set to start creating briefs and moving work forward.
Head over to My Briefs to your first brief.
Read more about Creating and Submitting a brief here.
Read more about what happens after a brief gets submitted. and Check out the full Knowledge Base articles here.
Was this article helpful?
That’s Great!
Thank you for your feedback
Sorry! We couldn't be helpful
Thank you for your feedback
Feedback sent
We appreciate your effort and will try to fix the article