The types and quantities of fields that contacts and companies are associated with can be endless and suitable only for your company. Magnetic gives you the ability to create your own fields for contacts, companies, opportunities, tasks and jobs
This means that you can add your own information fields to the Standard forms. Only users with Admin rights are able to make these changes.
Customer fields can be one of the following types::
- Date: Select a date from a calendar that pops us.
- Text: Write whatever you want in a text box.
- Large text: A larger than normal text box to write large amounts or words.
- Number: Type in any numerical number into the box.
- Dropdown menu: Create your own options for a dropdown menu that someone can click on to select.
- User list: A list of all the users on your account is available in this user list. Simply click on the username you want to select. This is a great option for adding a selection of account executives onto a job.
- Choice: Create options with tick boxes next to them that you tick to select.
- Heading: Create a heading where you need one and follow by creating more user fields under it
- Slider: Creating a slider with within a specific range. You can also set the step increments between each slide.
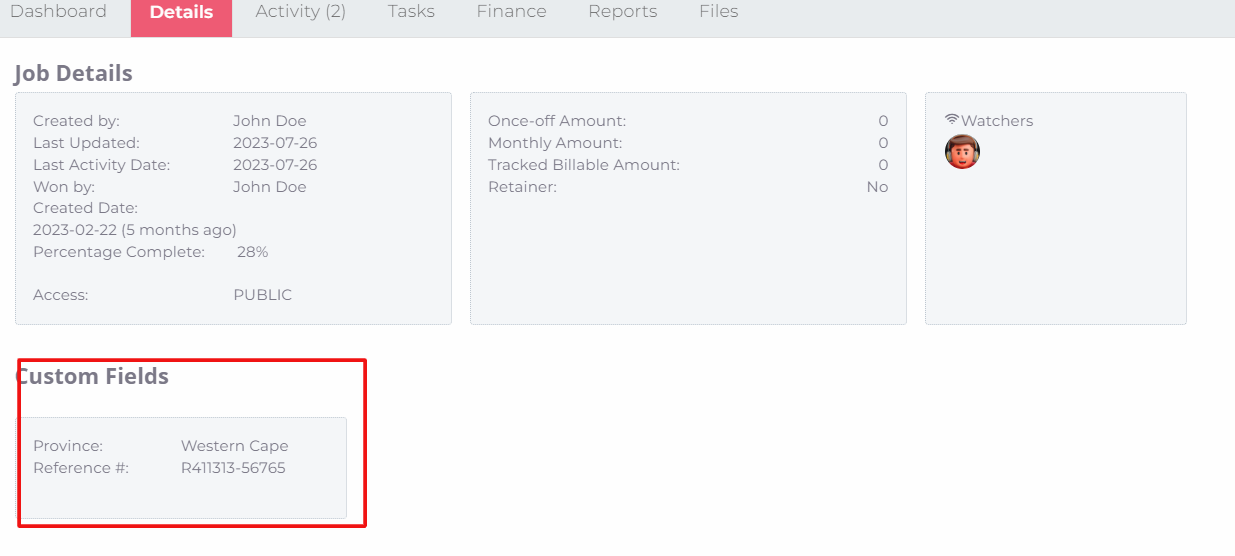
Please note the screenshot below has custom fields for "Province" and "Reference #" on a job.

How to Create Custom Fields:
- Hover over your name and click Settings.
- Click on Company Settings.
- Click on Opportunity / Job/Task
- Click on Configure Custom Fields.
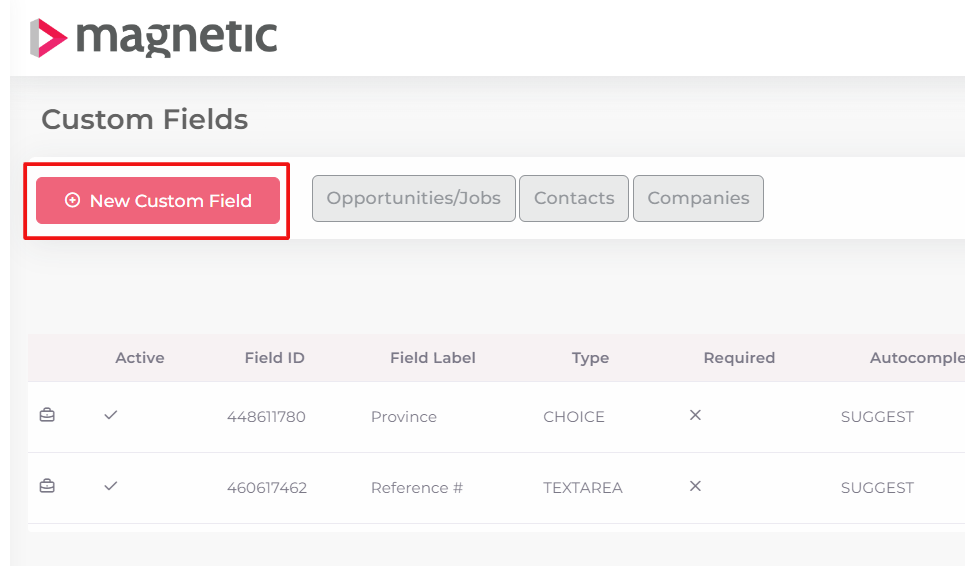
- Click on New Custom Field. (see screenshot below)
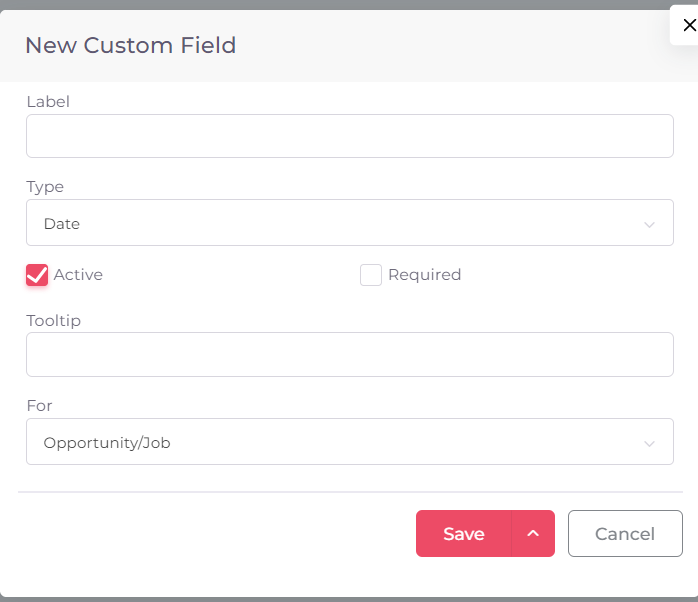
- Fill in the details for your custom field (see screenshot below)
- Save.
- The custom field will now be available when adding a contact/job/opportunity depending on the option chosen.


Below is a description of all the elements you can to fill in to create a new custom field:
- Label
- This is the heading for your custom field eg: Location.
- Type
- There are numbers types of custom fields you can add:
- Dates
- Text
- Large Text (an expanded field for paragraphs
- Number
- Dropdown (you can only choose one result eg: Cape Town)
- Choice (you can choose many results eg: Cape Town & Durban)
- Heading (You can categorize your section headings into Groups, any fields below the heading will belong to that group)
- There are numbers types of custom fields you can add:
- Tool Tip
- Here you can create an instruction that will pop up if someone moves their mouse over the dotted line.
- Values
- These are the results that you want to display.
- Each Value must be separated by a comma eg: Cape Town, Durban, JHB.
- For
- You can choose if you would like the custom field to be for a Contact, Company, or Opportunity / Job.
- Once you are complete hit save.
Searches Using the Custom Fields:
- Select the result you wish to search for, or add more filters to further define your search and hit the magnifying glass icon to search.
- Add as many additional filters as you like by clicking on "+Filter" and selecting the relevant filter from the dropdown menu.
- To search for contacts with particular custom fields click on clients on the top menu bar.
- Click on Contacts.
- Click on the dropdown arrow and scroll to the bottom - you will notice the label of your custom field.

Was this article helpful?
That’s Great!
Thank you for your feedback
Sorry! We couldn't be helpful
Thank you for your feedback
Feedback sent
We appreciate your effort and will try to fix the article